Sunday 24 November 2013

Gaige - So Much Progress!

Hello Travellers! As always, thanks for reading (especially these non-tutorial posts that don't have a direct benefit for the average reader), I appreciate every one of you, even though I have no idea who you are! Lots of news, mostly good, some bad.  I guess I'll start with the bad...

Miss you Blue!
RIP Blue <3
I know I haven't mentioned it to this point, but my favourite pets ever (and only pets ever, to be fair to all the other awesome animals out there) have all been rats - they're sweet, smart, cuddly, and they all have their own little personalities, oh, and they are so damn cute! So it's with a heavy heart that I announce the passing of one of my girls, Little Girl Blue (just Blue for short) at the tender age of two.  She was a wonderful rat who was stubborn and sweet, loved to climb, always wanted to be wherever she wasn't, and she's sorely missed. Blue was preceeded "over the rainbow bridge" by her sister Pumpkin, and leaves behind her happy, healthy sister Phantom. Here's the last pic of the two of us, from Halloween night, after everyone else had headed home and I was chilling on the couch taking a break from playing Borderlands to cuddle with my girls.  Miss you Blue!

Next up, I finally started a Facebook Page for my cosplay stuff! I resisted it for a long time, but because I'm trying to keep my personal Facebook separate from my cosplay, but kept wanting to be able to make posts and such on Facebook about it, so I gave in. If you want to check it out, it's at http://www.facebook.com/crankypantscosplay! I'll try to update it a little more frequently than I update here to keep everyone up to date on my progress and plans!

My Robin!
Rocking as Robin!
Thirdly, I noticed that I was getting some traffic from Cosplay Nation, and it turns out that they featured my Robin costume! Awesome, it's really nice getting props for my hard work - especially on a costume that needs so much work before next wear (new shirt, fix cape, and completely replace the shoe covers which had to be thrown out after the wet, muddy race). Thanks Cosplay Nation!

So I hit a bit of a snag with my Rubi - I mentioned that I planned to wire in a switch so I could click the lights on or off with the trigger. I bought the switch (again, because I lost the blasted thing the first time I bought it... small components are not my friend) soldered some wires to it, installed it so the trigger would activate it, and discovered that it was a MOMENTARY on/off, not a click on click off, meaning I would have to hold the switch to keep the lights on, which sounds like too much of a pain to me (and likely to put undue stress on the gun). So I ran back to my electronics store, and apparently they don't have anything that would fit the bill, and the only other place that may have it wasn't open by that time on a Saturday, and wasn't open Sundays either. Boo. So as I was working days Monday and Tuesday, the first chance I had to get the switch was Wednesday - and I did, but first I got distracted - oops!

In the meantime, I got started on my grenade mod! I'm making a legendary level Maliwan mod called "Rubberized Fire Leech." I had picked this one over my standard Torgue Bonus Package (almost all of my characters have these, and many hours have been spent farming Torgue Tokens to make this possible because EXPLOSIONS) as the one I had in hand when I was planning this costume didn't look all that memorable. I had also considered a Vladof Pandemic I had lying around, but figured Fire Leech would be easier to make work... until I discovered that hexagons are hard to draw (before I had to etch them in to the foam with the calligraphy point from my hot knife set), and the blasted thing is COVERED in them (guess what - so is my shield! I hate my life.. just a little bit).

The shaping and honeycombing alone took about eight hours, and was a royal pain in the patootie, but looks SWEET! Once that was done, I needed to find something to use for the windows that would be opaque enough to hide the innards, but clear enough to let all the light through.  After exploring a few other options, I ended up using the plastic from a freezer dinner container - success!   I also added an extra piece of craft foam inside to hold the LEDs in place and add a wee bit more stability to the body, and wired in the four LEDs for the main body, which glow so nicely though the window (though I don't think they're quite as bright as the green ones I've been using on Rubi). And I got the bottom part, top handle and side attachments together - up next, I need install the switch, then seal, prime, paint and coat it all, wire in the lights for the side and top, and put it all together!  Yeah, I know, no big deal!

While I was looking for window material, I started on my shield, which will be my favourite legendary shield, Maliwan's Impaler (Vlad would be so proud). I had two on hand when I was picking (a level 37 my baby mechromancer was using, and a level 50 that my siren had been using) and picked the one with the cool glowy honeycomb design on it, because more glowy = more better (and more grammatically incorrect). I didn't get very far before shaking my head and heading off to video game land for the night because the damn hexagons were killing me.

I've also been working on a few other parts of the costume... still no cloth bits though.  First the bolts for the choker! After searching toy stores and thrift shops for toy bolts I could use, I broke down and hit the hardware store to see if I could find actual bolts that would work... But the ones that were the proper diameter were all too long, and the ones that were the right length were all to thin. So I picked up mouldmaking and polyester resin supplies, and one of the too-long-but-right-diameter bolts. Because I have no idea what I'm doing, I'm still getting the hang of everything, but after two attempts at both moulding and casting, I have two acceptable-but-not-perfect bolts, but have learned a lot and am working on refining my technique. I'll either get it perfect or run out of time sooner or later! Oh, and I made ONE of the nuts. If you look closely, only the center one is a hex nut, and the other two are square, so I put one of the square ones together using one layer of 6mm and one layer of 3mm craft foam to get the desired thickness.

Colour is there!
Loving the blue!
Aaaand I've put some solid work into the shoes. After picking out all the stitches on the diamond quilting, I used multiple applications of 3D fabric paint to fill the holes, though I wasn't able to completely override the diamond impressions, at least the texture has been lessened.  Following that, I painted on several layers of the 3D paint, but it just wasn't giving the coverage I needed, so I switched to acrylic paint and fabric medium (to keep it from cracking and flaking) which has been MUCH more successful - they're almost perfect! And last night I started to build on the toe (to make them a little more rounded) and now I just need to make the toe and heel caps, and carve and apply a layer of 6mm craft foam to add the detail to the sole, make and attach the vault symbols, and paint on all the wee details and cell shading.

One of these days I'll start on my actual costume (hopefully soon because I have only have two weeks left)! I have all the fabric I need, templates I made for the front and back skulls, and picked up a pattern I can mod to make the vest, I just need to quit tinkering with all my props so I can get to it!! I was WAY slowed down last week by a bout of the flu... It's so hard to motivate yourself to be all creative when you're sick.

Next time, I'll have another update on my progress (as I really need to make some between now and then), and my very first non-cosplay tutorial that can also be used for cosplay - I'm using the technique on Gaige for sure, but it's also great for personal use or gift making - stay tuned to find out what it is!

Friday 8 November 2013

Ottawa Comiccon Convention Report!

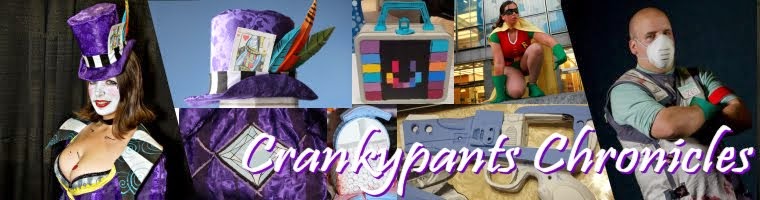
Hey peeps, welcome and thanks again for reading! I know it's still less than peanuts in internet land, but I'm OVER 2000 PAGEVIEWS! It's just nice to know that there are people out there reading my work. I had extra traffic over the last month, but I'm pretty sure it was just Halloween costume advice hunters - hey, if you pulled one off, let me know and send some pics, I wanna see them! lady.crankypants@gmail.com


After the race - we did it!
So the Rattle Me Bones race went well! I managed to scrape together the hubby's Batman costume, the cowl was far from perfect, but he was totally recognizable, which is the best I could do with two days notice (working 12h of each of those days, no less). I had a blast running in costume, though the cold took its toll (especially when the wind picked up and rain got started), and having people actually cheer me on by name was a bonus (you know, because my name IS Robin). I surpassed my fundraising goal by a generous amount - $334.50 total! And in the end, I finished in 1:14, which was a little disappointing, first because my goal was 1:10, and second because a few minutes after crossing the finish line I saw the clock was at 1:13, so I thought I had made it! My only consolation was that when I mapped the run after the fact, I discovered that the race route was actually 10.43km.  Oh well, at the end of the day, all I can do is train to do better next time! Speaking of next time, we signed up for another half marathon for next May - yes, I'm crazy, but it's that much more motivation to keep up my running and get into better shape!

So this is where I was going to post all about my progress, but I have a LOT to talk about, so I'm going to keep that for my next post, otherwise I'll end up being over 5000 words! I'm definitely not even close to being finished, but I have been working hard!


How easily distracted am I? Back on track with my Ottawa Comiccon Con Report - disclaimer: this WILL be photo heavy, and almost none of them are mine, but I will be linking directly to the source where possible. If I posted one of your photos and you would like it taken down, please let me know by email.


So it was a drizzly May day when at 6:00am I rolled out of bed to whip myself into shape to hit my first ever convention. This was OCC's second year, though I had missed last year's convention as I was out of town for a wedding. We decided to go on the Saturday in case we were able to get in on the masquerade, and because I wasn't available for the whole weekend, and Saturday is usually the most action packed.  I had been up to at least 2:00am finishing up last minute this and thats for my Moxxi costume, so I was thankful that I had full face makeup to cover my icky eye bags from not sleeping enough.  By the time I finished putting the finishing touches on my face, the hubby had rolled out of bed and was slowly pulling his costume together. We headed out nice and early (around 8:00am), doors opened at 10:00am, but last year the hubby had arrived only one hour early, and the lineup had been WAAAAAY around the side of the building in the sweltering sun and heat, so we wanted to beat the worst of it. Thankfully, this year the organizers had the forethought to set out a large tent with snaking line to keep everyone out of the drizzle and protected from any sun which may have decided to shine on us.


First photo of the day - Courtesy of Shadoswipe
The wait wasn't too bad, we were able to get a look at several awesome costumes along the way, and chatted with a nice brony and his cousin who were in line behind us while I did my nails. Being out of the drizzle was nice (even though my hair was already ruined) and by the time we made it inside the precipitation had cleared and it was just cloudy.


Ambushed in line by the photog for Audrey's
Inside the convention it was CROWDED, there were so many people, and apparently a lot of Borderlands fans, as the hubby and I were stopped just about every five steps by people wanting to take our picture. Our first stop was the Masquerade table, I had been considering pre-registering, but wasn't sure the costumes would be finished in time. I wasn't too hopeful as we came up to the table (the website had made it sound like space was very limited and VIP pass holders had been in for an extra hour already) but there were plenty of spaces open, and the masquerade staff were super helpful in getting our background music ("Ain't No Rest for the Wicked" by Cage the Elephant of course) off my phone and on to their computer in spite of the strict "bring your own CD" rules on the website (remember, I wasn't sure there would be space left, so I hadn't bothered making a CD). Once we were all signed up, we wandered!


Like this!
The exhibitor area was well set up with decent sized aisles and a LOT of businesses and artists to check out. We wandered slowly through the tables looking at this and that. The hubby collects various action figures and memorabilia from his favourite video games, so we had plenty to peruse for all the toy/comic shop booths, and we had a solid look through all the t-shirt vendors stuff as well looking for shirts that met our criteria - we both love showing off our video game love, but hate shirts that literally have the name of the video game plastered all over it. On our second walk through, he ended up picking up a fab Bioshock Infinite Songbird shirt we'd seen on the first pass but wanted to check out the competition before committing. They also had a pretty sweet skyhook shirt he had wanted, but they were all out of his size.

I was overwhelmed by the awesome stuff available in Artist's Alley, the level of craftsmanship from many of

Badass TF2 Group - Awesome Photo by Jason Walton
the artists, awesome steampunk stuff, neat prints, and all kinds of different jewelry and accessories! Some of the best things along the way were the legitimate armour display, the steampunk society's booth (and the awesomely costumed people within), the 501st display with all their amazing replicas, seeing the original Batmobile, the badass group of TF2 cosplayers we kept running into, an enormous collection of Daleks (I'm not even a Whovian, they're just super neat!), and just all the amazing costumes and people along the way. In the end I didn't actually end up buying anything, I just soaked it all in while random people stopped us to take pictures - it happened all the time, like every five steps, all over the place, way more than I anticipated. Heck, there were even points where we ended up stopping traffic because one person would ask for a shot, and suddenly five more jumped in to get their own. Considering the fact that the hubby hates having his pic taken, he was a great sport about all of it, and only snapped twice, once while the party requesting the photo was being super impatient while he was in the process of paying for something, and once when we had just gotten lunch and were clearly out of character and carrying food. We picked up lunch at one of the little café things built into the venue, chicken sandwiches (with real chicken breast), cactus chips, and an iced tea which came to about $15 if I recall correctly, which is really not bad for event food.


Sad blurry/off angle pics!
Dr. Zed stole a buzzaxe
After lunch we were wandering again when we ran into a few members of one of the Borderlands groups that had been floating about (we'd locked eyes, waved, winked etc. each time we passed eachother before that point), and they latched on to us saying they had a few MORE Borderlands cosplayers gathered, and were trying to do a group shot. So we followed along and got a massive picture of the group of us (Hubby and I, Lilith, Gaige, Maya (Zeveelia), Salvador, Axton, Roland, Jack, Daisy (Demelaa), another Dr. Zed, Tannis (Ailyse), and a psycho). Sadly, despite the fact that I SAW a few people with decent SLRs in the HUGE CROWD of people who gathered to get a shot of our awesome looking group, I only found blurry pics and crappy angle pics (sad face). If you happened to be at Ottawa Comiccon and caught a picture of our Borderlands group, PLEASE let me know. That said, I made my first few cosplay "contacts" through the group (Maya and Daisy are now Lilith and Tiny Tina), and we're looking at doing a Borderlands group photoshoot with a proper photographer at the next OCC if I don't have to work the whole weekend.
Better look at some of the awesome peeps! Not sure where I found the first, others at http://www.digitallounge.ca!
Shortly after that, it was time to head to the green room for Masquerade prep, photos, and pre-judging! Being my first con, first cosplay, and first masquerade, I was totally unprepared for a few things. Firstly, we were told to report to the green room for 3:30pm, but weren't aware that once there, we were unable to leave. If we had known this in advance, we would have brought some snacks and diversions along - oh well, the things you learn! The Den Parents were really nice and great sources of information and inspiration, and the photographer (Jocelyn/Belziir Photography) was really nice and professional, and did a fantastic job considering he wasn't permitted to use flash due to the green room being backstage from the main panels. While we waited we were able to listen in on the stuff going on onstage (the Burt Ward/Julie Newmar panel was going on when we first arrived, followed by Michael Shanks, who is awesome). The sound wasn't great, but it was still nice. We also chatted with a bunch of the cosplayers who were waiting, some who we'd met in line, others who were stuck sitting by us, and one who I discovered afterward I'd seen posting on Coscom!
Amazing shots from Belziir! Get a closer look over on my dA - http://ladycrankypants.deviantart.com
I also borrowed a hot glue gun from a Jackie Estacado cosplayer during this time to fix my belt buckle, which had come loose, and before that even, I owe a big thankyou to the ladies at the Audrey's Costume Castle booth for gifting me with the duct tape necessary to save my beautiful big blue and yellow button, which kept trying to fall off.

Pre-judging was a little nerve wracking, as I was not sure what to expect, so when I was asked the question "what did you make" I verbally vomited the contents of my last 21 days and explained almost every detail in about 25 seconds. I'm sure I missed important things, but the judges (Melting Mirror, Suzie of Suki Cosplay, and Lucy of Cats_Luna Cosplay) seemed impressed enough, and we found out the next day that our costumes were selected for a Craftsmanship Award for "Best Use of Paint!" Because by now you should know my philosophy - if it isn't perfect, PAINT THE CRAP OUT OF IT!


We were given a brief explanation of the process (waiting points, time limits, introductions/music) before a quick stage walkthrough (not practice, just walk across the stage, observe the best lighting points, see the clock that will be counting down) and then left to our own devices again as the crowd filed into the room. Since I had previously had no idea what a "walk on" really was, or that there was a 30 second time limit involved, the hubby and I took this time to establish a general strategy and discussed possible poses, actions, etc. In the end, 30 seconds feels like FOREVER when you're up there, but passes in no time at all while watching, and after I found a video posted months later (thank you Robert Christian!), I was pretty satisfied with the outcome!


Feel free to watch the whole thing, but we're on from 11:07 to 11:49

The masquerade itself ran pretty smoothly, we were able to watch on the monitors
From Just Push Play - Makes me giggle every time!
backstage until our den was on deck, then moved through the waiting stages until it was our turn.  I really enjoyed watching everyone else, seeing what they came up with for their walk ons and skits, and checking out the different stage techniques, and had an AWESOME time on stage strutting around and exuding as much Moxxi attitude as I could manage! As soon as we finished, that was it - we were hungry and tired, and as much as I wanted to stick around to watch the rest of the show, people said the video would be posted online (so I could see it anyway), the hubby was done, and we were out!


Some things I didn't take advantage of were any of the panels we weren't backstage for (I didn't take the time to plan in advance as Julian said they were never able to get in last year). I managed to catch the Jewel Staite panel with Nathan Fillion and Summer Glau (via Skype) on Youtube courtesy of Con Junkies (before all the panel videos were pulled down for legal reasons), which was awesome.  Next year I plan on having a pre-orchestrated list of panels I mean to attend, and boo to the hubby if he doesn't want to come with. We also didn't do ANY of the photo ops or signature things as I didn't feel like spending money just to meet a celebrity (even though there were some pretty awesome people available). I might consider it next year if there's anyone I just can't resist, but I can't think of anyone specicfic off the top of my head.

From http://www.digitallounge.ca
Our pair shot from the photo booth - love it!

Overall, Ottawa Comiccon was an awesome experience, and I'm definitely looking forward to OCC 2014, especially if the costumes I have planned come to reality. The convention felt well organized, the masquerade ran smoothly, and the exhibitors were awesome.  My ONLY complaint (aside from the crowding, but that's just the way a large event with a big draw works) was that we never got the certificate from our masquerade award, even though we were told it would be mailed if we couldn't make the awards ceremony (which we couldn't, as I was working on the Sunday). I've sent emails, but never heard anything back. For my first time in cosplay I had a fantastic time, and was really overwhelmed with all the positive feedback from the people we met along the way, and ALL THE PICTURES - SO many people asked us, and it was a lot of fun scouring the internets looking for decent snaps of us. I think my final total found was about 40 (not all awesome, but all pictures of us) though I'm certain there are more floating out there somewhere (if not in some dusty corner of someone's hard drive or SD card).


Voila, that ends the saga of Moxxi, Dr. Zed, and Ottawa Comiccon 2013! Sooner or later I'll be updating Moxxi for a proper photoshoot, but Gaige is kinda drawing all my attention at the moment (ERMAHGERD ERNLEH 30 DERHS TER GER!!!) Next time - a bunch of progress on my Gaige stuff, and I will be posting my first ever NOT (directly) COSPLAY RELATED TUTORIAL! It's goona be a "gooder" so stick around and you shan't be dissappointed (disclaimer: if you're disappointed, there is no legal action to be taken, and I might laugh just a little). Oh, and if you're looking for my Moxxi and Dr. Zed tutorials, there's a full list of tutorials in a wee box over --> on the right hand side of the page!

Saturday 26 October 2013

Moxxi Part 13 - Makeup and Hair (and Last Minute Batman)

Cheap-ass Batman Cowl
Running... In this.
As if.
Happy Robin!
Love those scales!
So my big race is tomorrow, and I'm happy to say I made my fundraising goal! Well, really, after my half marathon, a 10k doesn't feel that big, I'm just jazzed I get to run it in costume! Speaking of which, guess what the hubby decided YESTERDAY. Yes, the man who saw me busting my butt getting Robin together at the beginning of the month decided he was going to wear his half-assed Batman costume that was put together for the same Superhero Scavenger Hunt that the first version of my Robin costume was for. "Maybe I'll wear my apron over the technical shirt... I have the cowl too." Yes, husband, I'm sure you'll happily run 10 km with a kid's cheap plastic Batman cowl strapped to your face. As if.

So I sprung into action and started work on a cowl (Adam West style). Really, they're quite a bit more complicated than I had imagined, but I think I can pull off a modified version! Last night I made the face plate out of craft foam, then patterned the main hood out using the fabric from an orange shirt that I had picked up at the Salvation Army Thrift Store ages ago for another project (for which it was wholly unsuited and made a big mess of
Orange Derpman!
Almost finished mock-up (fits him better) - Next, in black!
orange lint everywhere). I put together my dummy cowl, and tailored it (to the best of my ability) to the hubby's head - a process he did not enjoy both because it distracted him from playing Batman: Arkham Origins, and because he apparently doesn't trust me with pins - I promise, I didn't prick him! Tonight, I will be ripping my tailored orange cowl apart and using the pieces as a pattern for the final version! Luckily, I just happened to have some black spandex hanging around (which was going to become my arm-glove for Gaige).  If I have any time left, I'll make a bat logo for him to pin onto his shirt instead of having to run in an apron. Easy peasy (I hope)!


Check me out, getting all distracted again! My masterpiece, she was almost complete! Really, putting the costume pieces together is the hard part, but I was really worried about the makeup as it's REALLY not something I have all that much experience with. The hair, on the other hand, I wasn't too fussed about, I asked my hairdresser for advice, and knew what I had to do.  Funny how the little ironies of life work, as I was totally happy with my makeup, but thanks to the rain and high humidity the day of the convention, my hair was pretty well ruined by the time I ended up inside. 

Moxxi's Makeups!
The LAST step! MAKEUPS and HAIR!
Materials needed (I listed the exact makeups I used, but use what you can find) - 

-White water based face paint (I used Craftobian Disguise Stix in Clown White)
-Makeup sponges
-Makeup brushes
-Pink blush (I used Hard Candy's Fox in a Box Truth or Dare)
-Peachy pink eye shadow (I used CoverGirl 274 Fairytail)
-Black eye shadow (also in Covergirl 274 Fairytail)
-Bright red lipstick (I used Rimmel 180 Jet Set Red)
-Black WATERPROOF liquid eyeliner (I used H2O Proof 881 Ultra-Black)
-Black volumizing mascara (or fake eyelashes)
-Black, red, and white acrylic craft paint
-Brown wig (or brown hair... I just used my own)
-Hair straightener and/or curling iron
-Lots of hairspray!
-Black nail polish (I used Sally Hansen Diamond Strength 480 Black Diamonds)
Makeup-less Moxxi? For shame!
No makeup? How plain!

So on to what I did well! The makeup! Welcome crappy lineart Moxxi (I pushed that pesky hair out of the way so we can see both eyes), who I put together in Paint Shop Pro for this guide because I totally forgot to take pictures as I was doing all this at approximately 6:00am the morning of the convention. I'll try to remember to take some step by steppictures next time I wear Moxxi (maybe even Halloween? We'll see)!


Step One!
Step One - Full face white waterbased makeup
Starting with the face - first layer is a nice even layer of white face paint ALLLL over the face, right up to the hair line at the top, to the ears on the side, following the jaw line, and covering the eyebrows. I used a water based paint as it dries nicely, doesn't smudge like oil based face paint, and I needed to apply more makeup over top of it. Now I went and forgot to pick up makeup sponges and ended up needing to use a kitchen sponge instead (oops). It worked well enough, but took a lot of work to get smooth and even.

Step Two!
Step Two: Light pink blush/eyeshadow

Next up, I applied the light pink blush.  Two nice pink circles on the apples of the cheeks, I didn't go as dark as I should have, but I was trying to be delicate. Then I also used the blush as the "shading" around the edges of the face, and under the nose. Also, as it was just the right shade of pink, I applied it using an eye shadow brush directly on my eyelids.


Step Three!
Step Three: Peachy-pink eyeshadow
The peachy pink eye shadow then went over top of the eyelids, and around the perimeter of the eye.


The black eye shadow went slightly tighter around the eye.  I also put on my lipstick at this point, nice bright red.
Step Four!
Step Four (and Four point Five): Bright red lipstick and black eyeshadow

Then came the fun part - the liquid eyeliner.  Did I mention the part where I don't really use makeup all that often? Well, liquid eyeliner is a bit of an advanced tool in makeup, and while it worked, I definitely ended up dabbing it off my eye with a q-tip more than once.  Icky. I made sure to get waterproof as I needed to put some on the underside of my upper lip, and didn't want it smudging and spreading. It still did a touch, didn't make a mess or anything.

Step Five!
Step Five: Waterproof liquid eyeliner EVERYWHERE!

Okay, so the eyeliner went first where eyeliner usually goes (the hard part). The edges of the eye were extended just a bit on the right eye, then a little further on the left where the "tears" come down. I went a little conservative on the black tears, I only drew on three, and ensured that there would be a little "web" at the top where the drops come down. I used just a little on my eyebrows to draw them back in, but tried not to go overboard. Then the rest of the cell shading came in! I did lines around and on the button of the nose, and over the top of the chin just under the lip. The lips are a little complicated - a very thin line on top, then a thick line around the bottom of the bottom lip.  I also shaded under the top lip, and had to stand around with my mouth open for a bit to ensure it was COMPLETELY dry.  Aaand the little curve out to the right of the lip, of course.  The final touch was the beauty mark.


Step Six!
Step Six: Pick your own eyelashes
I didn't bother trying to draw this stage, but I applied the black volumizing mascara at this point. I had planned on picking up fake eyelashes to give that extra little emphasis, but they didn't have any to my liking at Wal Mart when I was picking up all of my makeup and hairstyling goods. You can't really see Moxxi's eyelashes in detail in Borderlands 2, but in the first Borderlands she appears to have eyelashes that are very long on the outside of the eye, and pretty well unnoticeable on the inside. I'll look for them again beofre next wear.
Step Seven!
Step Seven: White paint. On your lip.
Not bad! Speedy PSP sketching win!

Finally, I highlighted the lips with white acrylic craft paint - a thin line along the top of the top lip, a thin line along the top of the bottom lip, and little dashes and lines down from there as necessary. Again, I stood around with my mouth open to allow the paint to dry. Face finished!


Introducing crappy lineart Moxxi chest, here to help with the rest of the makeup! For the chest, I started out with the liquid eyeliner, making the marks as per the reference - collarbones, cleavage, and little dashes where necessary. I painted the heart on in red acrylic craft paint, then once it was dry, outlined it in black acrylic craft paint, and painted on the "shine" in white. In putting this guide together, I noticed that I applied the shine on the wrong side of the heart - oops! And with that, my makeup was complete! I then coated my face and chest with a thin layer of hairspray to help seal all the makeup in, carefully closing my mouth and eyes so as not to poison or blind myself.

Chest Makeups!
Blank| Step One: Liquid Eyeliner Cell Shading| Step Two: Red acrylic heart| Step Three: Acrylic black outline, white shine
Don't forget to bring your makeup with you to the con! I needed to touch up a few times over the day!

On stage during the Masquerade!
Poofy, wavy, messy hair.
Photo from Just Push Play Ottawa
On to the hair! So as I said, this was pretty well a disaster in the end, in part due to the weather, and also because I wasn't willing to cut my hair as short as would have made my life easier (I grow and donate my hair every few years, so I don't tend to take all that much off if I don't have to). Okay, so first things first, I straightened the whole head so it would be nice and smooth, and gave an overall coat of hairspray. Now, the theory for the curls is that to get them to curl UP instead of corkscrewing, it needs to be pinched (in either a hair straightener OR a curling iron) then pressure needs to be applies as the tool is pulled downward, then start twisting slowly upward when you reach the point where you would like your curl to start, and keep turning until you're out of hair.  Keep to smallish chunks of hair, and hairspray each one as you go along.  Once it's all done, give a final decently heavy coat of hairspray over the whole mess. And it was almost perfect!! Uuuuuntil the rain and humidity and whatnot, after which the curls released, and my hair went right back to its standard wavy, poofy self. 

Nail polish!
The very last bit, the nail polish! Easy peasy, black nail polish, and I painted it on standing in line because (if it isn't obvious) I ran out of time! So there we were, standing outside in the line up, Julian holding the little bottle of black nailpolish while I painted my nails. It was a moment to be sure! 


And that is it! She was finished! I have a bunch of work to do before I wear her again, but I'm a wee bit preoccupied with Rubi at the moment, and have Gaige to worry about when I finish Rubi.  I have everything that I believe I need for the moment (though as you know, there's always more to buy, no matter how prepared you think you are) and I'm really looking forward to seeing her come together! That said, when I DO fix Moxxi, I'll be sure to keep you updated on the progress, and if I come up with any new and exciting ways to do things, I'll be sure to post all about it! If you find yourself trying to follow along and have any questions, feel free to let me know, and I'll be happy to help shed some light on my methods of madness!

INVINCIBLE! Muahahaha!
My cover shot from the Ottawa Sun's Digital Lounge - I'm Invincible!!
So next time, my first non-tutorial post! Shock! I'll be talking about my experience as Moxxi at Ottawa Comiccon, and sharing some pictures of our costumes, video from the masquerade, and, of course, sharing the latest progress from my Rubi! She's getting there I tell you! Oh, and I'll report back on how the Batman experiment went, and give you a Race Report - until then!

Every single Moxxi cosplay tutorial you could possibly need to make your very own Moxxi! (Or so I would like to think!)


Part 1 - Spats
Part 2 - Finding Fabric and Starting the Jacket
Part 3 - Jacket continued, Stripes and Zipper
Part 4 - Cuffs and Collar
Part 5 - The Button Solution
Part 6 - The Patches!
Part 7 - Belt and Buckle!
Part 8 - Rubi's Holster and Garter 
Part 9 - Finishing the Jacket, Piping, Rick-Rack, and Curly Tails!
Part 10 - The Hat, Card and Feathers!
Part 11 - Cell Shading and Blood Spatter
Part 12 - Shopping and Accessories to Complete the Look!

Sunday 20 October 2013

Moxxi Part 12 - Shopping and Accessories!

Hello world, I just CAN'T say enough about the progress I am making on Rubi! With this whole cosplay thing, there are times when I'm working on something and I say something along the lines of "God damn it, I've spent two hours working on this stupid little detail of this stupid little thing that no one will notice when I could have been doing so many other things"... but when I see results like this - 
More Rubi Progress!
I can't help but say "Hot damn this is awesome!" Which makes putting many more hours into it that much easier! At this point, I just need to shave down the handle again (it hadn't been quite wide enough), make a new trigger out of sintra, install the switch so the trigger controls the lights, re-install the lights, then find a way to fill, seal, and paint it with the LEDs in (without painting over them). It's going to be a challenge to say the least, but I'm sure I'll figure something out! I ALSO finished picking all the stitches out of my new shoes, and I'm up to $135 out of my $200 fundraising goal for Rattle Me Bones, which is coming up on Sunday! Only a week to go! In honour of that, have another Robin pic!
Robin!
Ready to give crime a big ol' POW in the face!

Just bits and bobs, almost there!
This and that, all that's left!
*cough* Back to business! So we're tying up the rest of Moxxi's outfit today! There's a LOT of little thises, thats and details left to be take care of, so it's time for some shopping!

Materials Needed:

-Gray Bra (preferably with a little built in va-va-voom)
-35cm Thin black lace with scalloped edge
-Black and white acrylic craft paint
-Acrylic fabric medium
-Turquoise panties
-Black and white striped thigh-highs
-Fishnet thigh highs
-Semi-opaque black thigh highs
-1.5m Black velvet ribbon 1" wide
-Black velcro
-Black fingerless gloves


Trying to pin down the bra design
Not the breasts - the BRA people! Hard to tell the design...
 So the first challenge (and the craftiest part of this entry) is the bra! As always, I wanted to be as accurate as possible, the more authentic the bust the better! I searched EVERYWHERE for something that might even come close to Moxxi's bra. Any time there was anything even close (semi lacy with gray snakeskin print) the bra wasn't even made in my size (one of the many trials of being well endowed).  I ended up picking up a decent silver push-up with matching lace at the bottom of the cup where it wouldn't be seen. Once I had it, the challenge was deciding on a pattern - as most of the bra is covered, it's difficult to see exactly what's there aside from variations of gray, so I went for something very Moxxi - stripes and swirls. I tested a few different shades on the back of the bra, and actually ended up using just fabric medium for the stripes, and dark gray mixed with fabric medium for the swirls. Once the paint had dried, I sewed on the lace! Since I hadn't been able to find a thin enough lace (let alone one with scalloping only on one side) I opted for one with scalloping on both sides, then sewed down the center of the lace, then folded it over and sewed it along the top of the cup. Perfect!
Moxxi's bra!
Stripes and swirls - very Moxxi-esque!
Moxxi's chokerNext up was the choker and waist tie! Both were made out of 1" wide velvet ribbon, and while I had been planning on picking up black, all Fabricland had was dark brown, which worked out as looking at the 
references, they do actually appear a little brownish, and the velvet napping provided the same kind of variation as the cell shading in the game. For the waist tie, I figured out how much I needed by wrapping my measuring tape around my hips as though it were the tie, and picked up that much ribbon. It needed no modification other than cutting, then it wraps around the hips twice before tying in the front. The choker was super simple, much like Dr. Zed's armband, just wrapped it around my neck to figure out how long it needed to be, then sewed the two halves of the velcro on the ends - one on the top side, one on the bottom side. Easy peasy!

Panties!
From there on out, it was shopping, shopping, shopping! Next up were the panties! There's not much to see of them in the game, but they're definitely turquoise, and seem to have a little scalloped edge on the top and bottom.  They appear a little plain, so I searched for a lacier variety, and ended up finding just the thing at La Vie en Rose - a two-tone "Brazilian" thong, white underneath and turquoise over top.  They sit nice and low on the hips so I didn't have to take the thigh of the jacket up quite so high in order for them to be visible (have I mentioned that I don't like revealing clothes? I know, a bit rich from a Moxxi cosplayer). For comfort AND so I could keep them low on the hip without having them out of place elsewhere, I wore them over other underwear.

Stripy leggings!
Next up is the legwear! For the stripy leg, I picked up black and white "Music Legs" footless tights on ebay as the stripes appeared to be approximately the correct thickness.  For the other leg, in the reference it appears that there's a fishnet pattern ON a black pantyhose, but as I couldn't find one, I picked up a black thigh high at the dollar store, and put a random fishnet I happened to have at home over top. Once they were on, I ripped the holes in it as per the reference. That said, the fishnet I had, the diamonds were too small, so before next wear, I'll be picking up a more accurate set, and getting some better black thigh highs that will actually stay up (fingers crossed).

Cheap ass workout gloves
Finally, the last piece - the gloves! I got frustrated looking for these, just no luck online or in local stores, so I ended up picking up the cheapest pair of plain black workout gloves that SportChek had to offer and called it a day. I'm not entirely satisfied with them, so I'll be making new ones sooner or later out of pleather with the holes in the knuckles, but they worked well enough! If you're looking to buy something better, year-round costume stores or those stores that pop up around Halloween might have some (I spotted something similar at Spirit Halloween the other day while looking for plastic bolts).

And, if I'm not much mistaken - that is IT! Every piece of Moxxi's costume! It took a heck of a long time to put everything together, but it was so rewarding to see it all come together! The only things left now are hair and make-up! I'll give a full description for make-up at least, but my hair was a bit of a disaster, we'll go over why... Next time!

Everything else you need to make your very own Moxxi costume:

Part 1 - Spats
Part 2 - Finding Fabric and Starting the Jacket
Part 3 - Jacket continued, Stripes and Zipper
Part 4 - Cuffs and Collar
Part 5 - The Button Solution
Part 6 - The Patches!
Part 7 - Belt and Buckle!
Part 8 - Rubi's Holster and Garter 
Part 9 - Finishing the Jacket, Piping, Rick-Rack, and Curly Tails!
Part 10 - The Hat, Card and Feathers!
Part 11 - Cell Shading and Blood Spatter

Thursday 17 October 2013

Dr Zed Part 5 - Accessories and Finishing the Look!

Rubi Progress!
A LOT of work left, but it's coming!
Hello again ladies and gents! Things are going fast and furious around here - (Canadian) Thanksgiving has already come and gone, and I taught myself how to make PUMPKIN PIE. From scratch. Like, I started with a frikkin' pumpkin. It was delicious. On more important notes, I now have almost everything I could possibly need for my Gaige! I finally found satisfactory shoes for the low, low price of $10 (though there is stitching to be picked, paint to be applied and detail to be added) which is spectacular, as I was close to spending over $40 (including shipping) on internet options on more than one occasion. I also picked up the last few circuit components, found 9v batteries on sale at Costco, and got the blue pleather and black lining for the vest, white pleather for the skull on the back, and the cord I need to make the black piping. Oh, and I spent about an hour and a half dremel-clone in hand last night working on shaping my Rubi, and I must say, she is looking HOT! Can't wait to see what she's like when I'm finished, but there are many steps and a few logic hurdles for me to jump between now and then.

Also, the wonderful Captain Crankypants (aka Tom) and I ROCKED our Robin photoshoot, and I'm up to $95 of my $200 fundraising goal (so far)! I'm pretty stoked with how the pictures turned out (in spite of ripping a solid run in my tights and a hole in one of my shoe covers during my very first "hey, I'm gonna climb on this: moment) and the response from my friends and family has been overwhelmingly positive! If you have any disposable income you don't mind parting with, and would like to support an awesome cause, click over to my fundraising page - Rattle Me Bones Sponsor Page! I'll post more of the pictures later, or if you're feeling impatient, you can pop over to my Cosplay.com member gallery!
Action shots of my new Robin costume!!
In anything if you want to go from just a beginner to a pro, you're gonna need a montage! We had too much fun.
Back to work! Two Dr. Zed posts in a row? Who would have thought it possible? Not only that, but this is it, the end of the line, the last pieces of the Zed puzzle - accessories and finishing the look! So to figure out what is needed, we take one last look at the guy himself:

Materials Necessary -
The final pieces!
The final pieces of the Dr. Zed puzzle!

- Light green turtleneck
- Dark gray pants
- Big black boots
- A face mask (I used a cheap one from Home Hardware)
- Eye shadow
- Black marker
- White, black, and red acrylic craft paint
- Red fabric (I used broadcloth)
- Red thread
- A bit of velcro
- White bristol board
- Watercolour pencil crayons
- Safety pin
- Tape
- A band-aid

So let's talk shopping! The last big purchases for Dr. Zed were all clothing pieces.  The boots, Julian already had - we used standard black combat boots (as you can find in any old surplus store). Technically Dr. Zed's are supposed to be strapped and buckled, but I didn't have the time to make boot covers to that effect, and I don't feel it detracted from the overall look. The pants were super simple, from what I can tell they're just boring gray pants, so I picked up a pair of gray jeans from Wal Mart.

Thrift store success.
Turtleneck'd! And crooked.
The shirt was interesting. At first I was going to stick to the standard medical green scrub shirt most Dr. Zed cosplayers go for, but I was planning on making a collar from some of the shirt that wouldn't show under the smock, and maybe extending the sleeves a little to simulate bunching. Until I couldn't find one (in my husband's size). We tried every second hand store, we even tried some specialty shops (one that would have had it was closed when we tried) and every time I found something close, it wasn't quite right, the right size, or close to the right colour, until we lucked out - the light green turtleneck.  We found it at a second hand shop (Value Village) and the blasted thing is PERFECT.  I didn't have to adjust, change or play with it - just put it on, bunch up the sleeves and away you go! Now obviously there won't necessarily be one of these babies sitting in every second hand shop, so here are a few passable ones on Amazon-
Option oneOption two
There are other options, of course, making one, just using a scrub shirt, but for accuracy (especially at thrift store price) this one knocked it out of the park!

Now it's time to get crafty! For the mask, I used a standard particulate filter facemask from Home Hardware. I'm planning on making a better one at some point, but this worked for the time being, looks fine in person, but isn't perfect for photo purposes. At the time, I was worried mostly about breathability, so I figured pre-made was the way to go.  The mask I purchased came with a metal band and a company's stamp on it, both of which I didn't want showing, so I carefully painted over them with acrylic craft paint, which took a few coats. Next, I shaped the mask with scissors to be as close to the shape of Dr. Zed's as possible without compromizing the structure. Then I drew in an outline and the three lines in the center of the mask using black sharpie.  In order to darken the mask, provide some depth, and create some shading without compromizing breathability, I brushed on a few different shades of eye shadow.  And voila! Mask complete!
Zed's Face Mask - Finished!
Paint, shape, cell shade, eyeshadow! Observe the painted parts.

Dr. Zed's Armband!
Aww, Dr. Zed lurves yuuuu! Check the velcro placement.
Next - the arm band!! For this, I got Julian into the turtleneck and bunched up the sleeve, then measured around the bunch to see how long it needed to be. I then took my broad cloth, folded it, and measured and cut a long thin rectangle (4cm folded x 42cm or so).  The band was stitched along the open edge to make a tube, then flipped right side out and ironed flat. I then stitched along the outside of the band, flipping the ends in to seal them in place, and stitched the two halves of the velcro in place at each end (make sure one is on each side so it makes a loop when closed). Voila - band! From there I.... Cell shaded! Black fabric marker, dark red (red and black acrylic craft paint mixed) to shade, white to highlight along the edges of the band (all paint mixed 50/50 with fabric medium). And finally, I painted in the cross and heart design.  It took a few coats of paint to make the white parts solidly white (it soaks into the fabric pretty well) but after a few tries it was perfect!

The final creative piece is the "Hello my name is" tag.  I opted to make this out of bristol board instead of on fabric, as these tags are usually stickers, so cardboard is a closer match. Just like the playing card for Moxxi, I drew the design on in watercolour pencil crayon, then painted over it in water to smooth out the colour. Once the design was complete, I taped a safety pin to the back of the card with a few little strips of packing tape, and pinned it on to the smock. Done and done!
my name is Dr. Zed
Screencap/Drawn in watercolour pencil crayon/Painted with water
The final detail was applied the morning of the convention - a single band-aid (I used one of the fabric ones as I was more confident that it would stick and stay) applied on the "armour" portion under the smock as per in-game Zed. The end! That's everything that went into making Dr. Zed - and doesn't he look so good!
Dr. Zed - Terror!
As seen in the Ottawa Sun Digital Lounge - I LOVE the headline they chose, muahahahaha!
The things I didn't do, or plan to fix before next wear:

The wig: I'm not sure this will ever come to be.  I picked up a relatively cheap "vampire" wig from a costume store in the area, as the hair is already brushed back, and has bits of white on the temples, much like Dr. Zed's peppering of gray. As I may have mentioned, I was in a huge time crunch by the end of the line, and I pulled it out of the bag the night before the con - not only was it a royal mess, in need of drastic cutting and styling, but the underside was super itchy, and I hadn't thought to pick up a wig cap.  The hubby would NOT survive all day in it, and there were other, more likely to succeed matters that needed my attention, so we scrapped it. I may pull it back out before our photoshoot, but for Ottawa Comiccon, he went wigless.

Make-up: I wanted to do a wee bit of cell shading... Maybe draw in some stubble on the face, lines on the arms, you know, add to the authenticity of the look. The hubby said no. Mostly because he was afraid of the looks he might get if he wasn't able to wash it off effectively. If you're more daring - go for it!

The face mask: Now that the time crunch is off, I would like to make a more accurate face mask, and have a few ideas on how I may go about it - namely craft foam and stretch material. Shape the craft foam, fill it with holes, cover with a thin stretch material (as it should be breathable). We'll see if I find the time for it, AND how it works out. If yes, a tutorial will follow.

The buzzaxe: I never made it in time for the convention, but have a general concept, template and a foam sword base I'll be working from. It's going to involve a lot of craft foam, apoxie sculpt if I can get my hands on some for a reasonable price, and if I can find a small enough motor, the blade may even spin! We'll see how it goes, again, if it works out, a tutorial will follow!

(Totally optional) contact lenses: Julian's eyes are just about right for Dr. Zed, so we didn't worry about this, but green/hazel contact lenses would complete the look for anyone not blessed with the right colour. Bonus points if you can get one that enlarges the pupil and one that doesn't!

If you should choose to follow in my footsteps and make yourself (or someone you love) a Dr. Zed costume - drop me a line! Let me know how it goes! Send pictures! And most importantly, feel free to ask questions (in the comment box on any post or by email at lady.crankypants@gmail.com) if you're trying to follow along and something doesn't make sense - I'm here to help! Good luck! Next time, we'll be back to Moxxi with some shopping and craftiness to finish her last few accessories! Stay tuned!

Following along to make yourself a Dr. Zed? Here's the full list of tutorials!
Part 1 - Smock Basics
Part 2 - Shoulder Armour and Flask Pocket
Part 3 - Buckles, Buckles, Buckles
Part 4 - Blood Spatter and Cell Shading